I’ve been looking around for a good Continuous Integration service that doesn’t just support GitHub. GitHub is great and I use it for all of my hosting all of my open source projects, it’s just I use Codebase for all of my private & client projects.
I’ve had issues in the past setting up Jenkins mainly due to there being no good tutorials out there for setting it up properly for testing Rails projects. So here I am with a post on how I have it installed & setup.
In this post, I’m using a new DigitalOcean server with Ubuntu 12.04 x86 (32 bit). I’m running most (unless stated) of the commands as root.
Initial Setup
The first thing to do when creating the server is to update it.
apt-get update
apt-get upgrade -y
Once the server has been updated, now it’s time to install other programs such as MySQL and some utilities.
apt-get install -y build-essential git-core curl htop nano vim python-software-propertiesTo install MySQL, run this command. It’s recommended that you set a password when it asks.
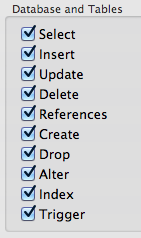
apt-get install -y mysql-client mysql-server libmysql-ruby libmysqlclient-devI’ve created an account called builds with no password but with the following global permissions.
We can now continue with the install of Jenkins.
Jenkins Installation
To install Jenkins, we need to add the repoisitory to our apt-get sources.
wget -q -O - http://pkg.jenkins-ci.org/debian/jenkins-ci.org.key | sudo apt-key add -

echo deb http://pkg.jenkins-ci.org/debian binary/ > /etc/apt/sources.list.d/jenkins.list

apt-get update
apt-get install -y jenkins
This may take a while to install.
Once it’s installed you should now be able to run Jenkins by running this command.
/etc/init.d/jenkins startYou can then access the server at http://YOUR-IP:8080.
If that doesn’t load for you, it may be that your server doesn’t have enough RAM or the max RAM hasn’t been set in the Jenkins config file.
Let’s tail the log to find out why it’s not starting. I like to keep another terminal tab open with this command running while setting the server up.
tail -f /var/log/jenkins/*.logOn my server, I’m getting this error which means that Jenkins is using too much RAM.
Exception in thread "RequestHandlerThread[#1]" java.lang.OutOfMemoryError: Java heap space
To rectify this, stop the Jenkins server and edit the Jenkins config file.
/etc/init.d/jenkins stop
nano /etc/default/jenkins
Once the config file is open, you should see the following options
# arguments to pass to java
JAVA_ARGS="-Djava.awt.headless=true"  # Allow graphs etc. to work even when an X server is present
#JAVA_ARGS="-Xmx256m"
#JAVA_ARGS="-Djava.net.preferIPv4Stack=true" # make jenkins listen on IPv4 address
The option we want to change is #JAVA_ARGS="-Xmx256m". Remove the comment (#) from the start of that command and that should be it. In my case I had to change the 256 to 512.
Close & save the file and start the server up again.
/etc/init.d/jenkins startIf you are tailing the log at the same time, then you should see this
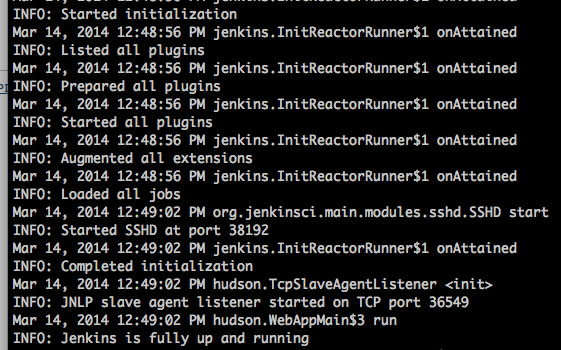
You should now be able to access the server at http://YOUR-IP:8080.
That’s Jenkins installed. Now to configure it.
Nginx
OK, at the moment we now have Jenkins installed and accesible through the web browser on port 8080. Now let’s setup Nginx so the site can be accessed without the port 8080.
add-apt-repository -y ppa:nginx/stable
apt-get update
apt-get -y install nginx
/etc/init.d/nginx start
Once Nginx is installed, we need to create a ‘site’ for it so Nginx knows what we want to do.
Create a file at /etc/nginx/sites-enabled/jenkins and paste the following code in, changing anything necessary:
upstream jenkins {
  server 127.0.0.1:8080;
}

server {
  listen 80 default;
  server_name ci.my_site.com;

  try_files $uri @jenkins;

  location @jenkins {
      proxy_pass http://jenkins;
      proxy_set_header X-Forwarded-For $proxy_add_x_forwarded_for;
      proxy_set_header Host $http_host;
      proxy_redirect off;
  }

  location ~ /job/\w+/build {
    root  /var/cache/.jenkins/war;
    try_files $uri @jenkins;
  }

  location / {
    root  /var/cache/jenkins/war/;
    try_files $uri @jenkins;
 }
}
Once the file is created, restart Nginx and you should be able to access Jenkins without a port. You may have to remove the default site, if so run rm /etc/nginx/sites-enabled/default.
/etc/init.d/nginx restartYou should now be able to access Jenkins on http://YOUR-IP or http://YOUR-HOSTNAME
RVM
RVM is great for installing and using multiple versions of Ruby on one machine.
Before we can install it, a password needs to be set on the jenkins account and the account needs to be part of the sudo group.
passwd jenkins
usermod -a -G sudo jenkins
Now we can login to the jenkins account and install RVM under that user.
su jenkins
curl -L https://get.rvm.io | bash -s stable --ruby
The command above installs RVM and installs the latest Ruby version, which in this case, is 2.1.1.
If you’ve not used RVM before, it’s very easy to install different Ruby versions and use them. For example, if I wanted to install Ruby 1.9.3, I would run rvm install 1.9.3. It’s that easy.
Then to use Ruby 1.9.3, you run rvm use 1.9.3.
If you wanted to set Ruby 1.9.3 as the default version, then rvm use 1.9.3 --default.
On my server, I’ve installed Ruby 2.1.1, 2.0.0 and 1.9.3.
SSH / Git
While we are still logged into the jenkins account, we can setup some SSH keys for this user so we can easily & securely connect to Git repos.
cd ~
ssh-keygen -t rsa
cat .ssh/id_rsa.pub
Copy that SSH key and paste it as an SSH key in GitHub or Codebase and you’ll then have access to that repository.
You can now log out of the jenkins account as we don’t need to be logged in anymore by typing exit and hitting enter.
Jenkins Setup & Plugins
Now Jenkins is installed, we can add some plugins to enhance the setup & usage of the server.
On the left hand side, click on Manage Jenkins then Manage Plugins. There may be some updates available. Check all of the plugins in the Updates tab and then Install without restart. You will be taken to a page showing the progress of the install/update.
Once they’ve been updated, go back to the Manage Plugins page and choose the Available tab. Because this page is very long, I normally CMD+F or CTRL+F to find the plugin I’m looking for.
In the list, select the following and hit the Install without restart button:
- Git plugin
- GitHub plugin
- RVM plugin
- Green Balls
Check the box at the bottom of the page that says Restart Jenkins. Some plugins require Jenkins to be restarted in order to work properly, however, most plugins work fine without a restart. It will show when Jenkins needs to be restarted, like below.

First Project
We are now ready to create out first Jenkins project.
Go back to the home page and click on New Item in the sidebar on the left. You will be asked for a name and a few select options.
Select the Build a free-style software project option.
After creating the project, you will be redirected to the configuration page where you can change the name, the repo settings and more.
We want to change the GIT repo so select the Git option and paste the URL of your GIT repo.
If you get an error like this, then you need to login to the jenkins account again and verify that you can connect to that host’s server over GIT. In my case, I’m using Codebase so I had to run ssh git@codebasehq.com and just type yes.

Once that’s done, enter the repo again and that error should disappear. If there’s no error, that means it can successfully connect to the repo.
Scroll down and check the Run the build in a RVM-managed environment and type the Ruby version and gemset name (if you want). I normally use 2.0.0@app_name. That way it keeps gems separate to each app that I want to test on my Jenkins server.
Now we need to create a ‘build step’. This runs commands that test your app. In this case, choose the Execute shell option and paste the following into the text box provided. Change the my_project_test to the database of your project.
#!/bin/bash -x
export RAILS_ENV=test

bundle install

read -d '' database_yml <<"EOF"
login: &login
  adapter: mysql2
  username: builds
  password:
  encoding: utf8

test: &test
  database: my_project_test
  <<: *login
EOF

echo "$database_yml" > config/database.yml
rake db:create db:test:prepare
bundle exec rspec spec/
Hit Save and then Build Now in the sidebar. This will start a build of your project. You will see the Build History table populate. Click on the date and you will be taken to that build. Click on the Console Output option in the sidebar to see a live console of the build taking place.
On each build, bundle install is run so you need to be sure that all the necessary pre-reqs are installed for your project.
In my instance, my build failed because I don’t have a JavaScript runtine installed.

In order to fix this, I’ll install NodeJS using thw following commands
add-apt-repository -y ppa:chris-lea/node.js
apt-get -y update
apt-get -y install nodejs
Now NodeJS is installed, I’ll run the build again by clicking the Back to project then Build Now button in the sidebar. Again, click the date and then on Console Output
Success!

Notifications
Now that Jenkins is setup and working, how will you know if a build fails?
In this example, I’m going to setup email notifications. I use Postmark for most of my outgoing email from apps so all I need is the SMTP server and username/password.
From the home page, click on Manage Jenkins then Configure System. Scroll down and you’ll see an E-mail notification option. Fill out the SMTP server, which in my case is smtp.postmarkapp.com.
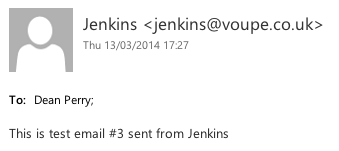
If your SMTP server requires authentication, which most do, click on the Advanced button and enter the username and password in the required fields. To check it’s all working ok, check the Test configuration by sending test e-mail box and enter your email address. Click the Test configuration button and if everything is ok, you should receive a test email from Jenkins.
Go back to your project and then Configure. Scroll down to the bottom to Post-build actions. These are scripts/actions that run when a build has finished, whether it passed or failed. Click the Add post-build action button and choose E-mail notification. You’ll have a field to enter an email address to notify. Checking the Send separate e-mails to individuals who broke the build box will send an email to the person who last commited and broke the build.
Done
That’s it, you’ve not got a Jenkins CI server up and running running Ruby on Rails tests!